Real Food for Real Life
Showing posts with label preserving food. Show all posts

Saturday, September 3, 2011

.Summer's end...

This bowl of cherry tomatoes has become a fixture on my kitchen windowsill.

This last weekend of summer has been brutally hot, with afternoon temperatures of 100+, so I have kept myself busy indoors, with much time spent in the kitchen.

The mozzarella doesn't show well against a white plate.
I have stocked up the fridge with a Key Lime PieMojo de Ajó, and a variety of salads for the weekend (and coming week), including longtime favorite Three Bean Salad and a Caprese Salad using my homegrown basil and drizzled with the Balsamic reduction  that I have recently become so fond of.  I also added slivers of red onion to this one since I had a bit left from another salad and it seemed a shame not to use it.

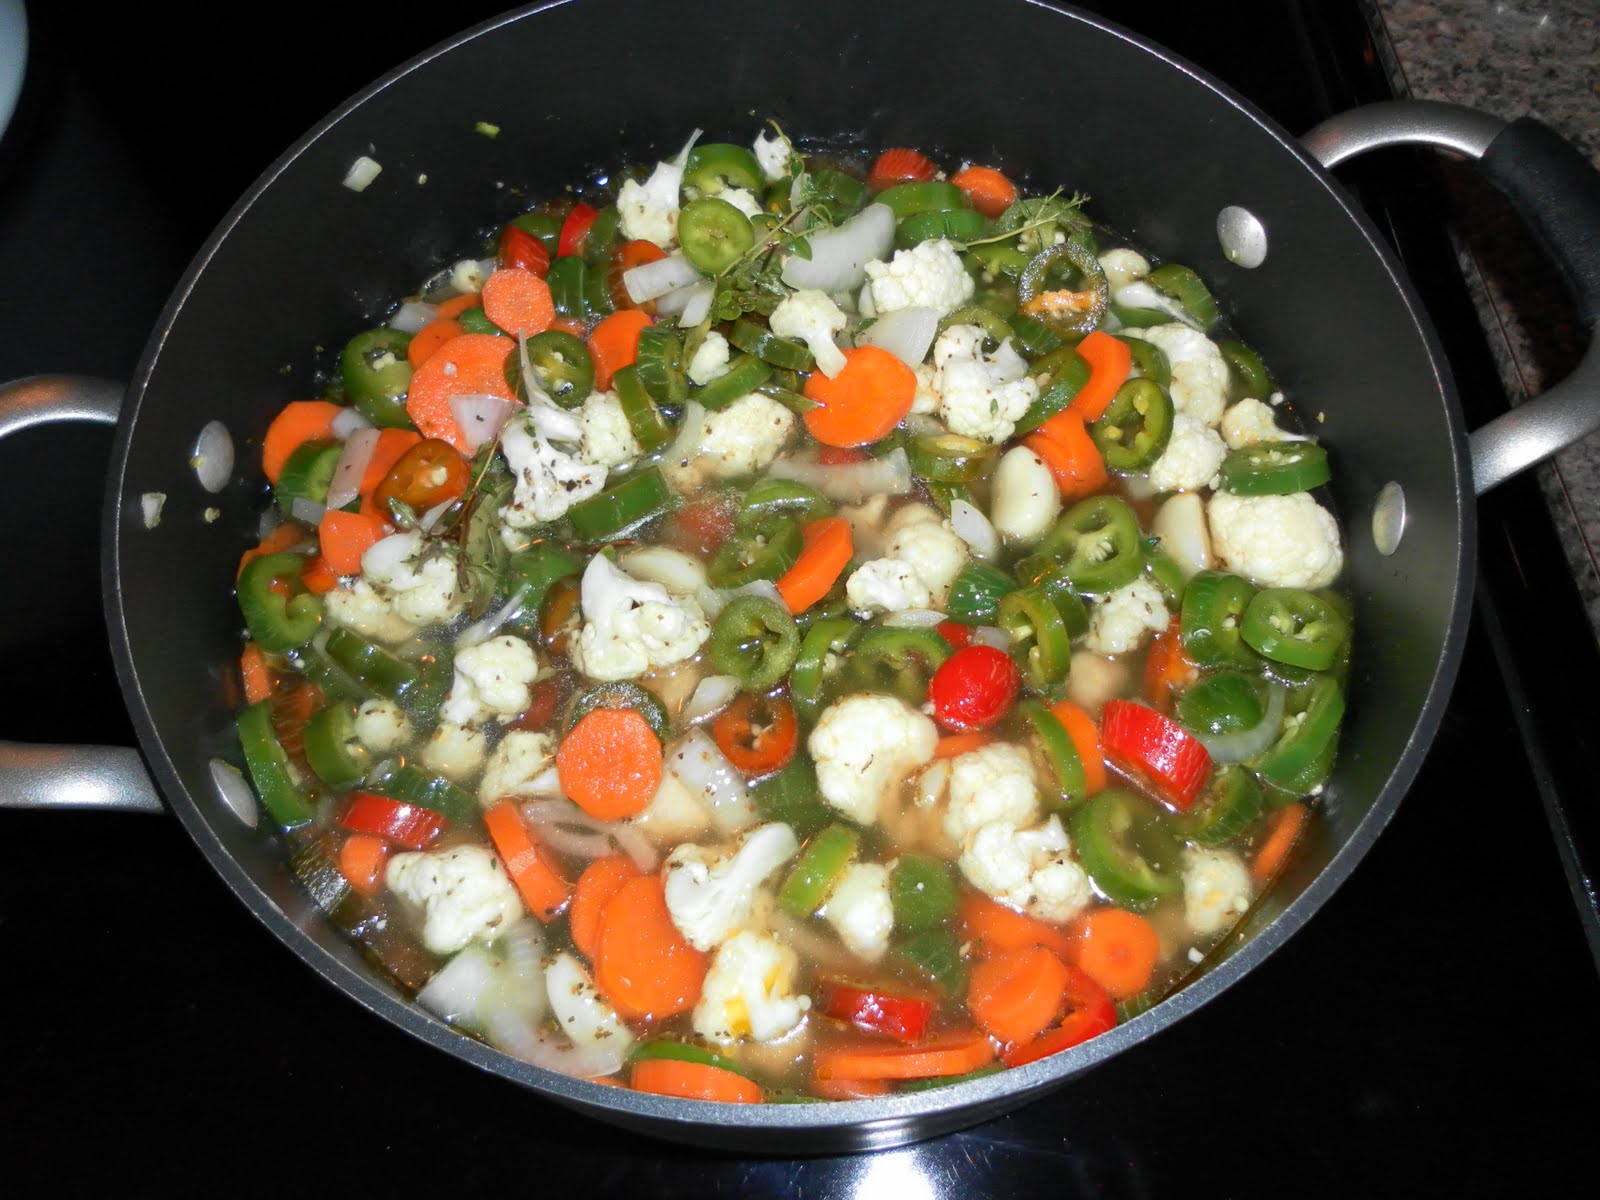
As pretty and practical as it is, I have given up trying to grow veggies in my beds...we have too many rabbits and deer and I just don't have it in me for the heartbreak (at least they are no longer eating my roses :).  This leaves me growing in pots on the deck...this year I have basil (as always), cherry tomatoes, and jalapeños.  It was time for another jalepeño harvest, so I pickled more, hopefully we will end up with enough this year to get us through the winter.

It also seemed a good time to start putting away pesto for the winter, putting away 1/2 cup portions in small freezer containers, just covered with a slick of olive oil.  By next weekend I'll be able to harvest more basil for future use...I can't even imagine paying $2 anymore for the tiny little grocery package when I am cutting it by the armful.  I also mixed up some Pesto Cream Cheese for Christopher and I to share over the next week.

Now about the cherry tomatoes...our friends Doug and Sharon Trimmer own Trimmer Hardware here in Hamilton, and every year Doug starts hundreds of tomato plants himself to sell in the spring (they are his babies :).  I sent Ben this spring to get me two plants, figuring he would get Romas, or some nice slicing variety, but he came home with FOUR cherry tomato plants.  The plants have done beautifully in their pots and we have enjoyed the little bites of sweetness all summer in our salads, as well as roasted with olive oil and garlic slivers (my mouth waters just thinking of it).  Well, what was a fairly small, but constant, supply over the summer, in this last week has exploded and I had several POUNDS of the tomatoes.

I have been craving Tomato Pie anyway, so I used two pounds of quartered cherry tomatoes in place of the regular tomatoes and was not disappointed in the least.  The resulting pie was not nearly as wet, and the tomato flavor was more concentrated (and sweet), so I think this shall be repeated.  If you have not tried Tomato Pie before, now is the time.  We have found it to be particularly nice for breakfast with some fresh fruit, especially summer cantaloupe.

Doesn't that make your mouth water?

Thursday, August 18, 2011

A different twist on an old standby...

Bell Pepper Puttanesca with turkey Italian sausage
and whole grain penne

Now to keep up with the bell pepper theme of the last post.  On another recent occasion of bell pepper bargains, I decided to make one of my pantry favorites, substituting the fresh red bell peppers for the canned, diced tomatoes I would normally use.  I love puttanesca, not only for its ease of preparation, but for the savory, spicy, and salty flavors that suit me so well.  This recipe makes a lot, so it's perfect for freezing half for a later, hectic, day.

Red Pepper Puttanesca

2oz. can anchovy fillets, in oil
6 red bell peppers, seeded and diced fairly small
6 cloves garlic, minced (2 tbs.)
1/4 cup extra virgin olive oil
3 finger pinch of coarse salt and a generous grinding of black pepper
1/2 to 1 tsp. crushed red papper flakes
6oz. can tomato paste
1 1/2 to 2 cups dry white wine
1/2 of a 2oz. jar of capers, drained
1 heaping cup pitted kalamata olives, quartered lengthwise

The anchovies break up quite easily.
In a fairly large nonstick pan, warm the olive oil with the anchovies and their oil over medium heat until they break apart (this doesn't take long if you assist with a wooded spoon).  Add the garlic and bell peepers and continue to saute until tender.  Season with the salt, pepper and pepper flakes, stir in the tomato paste and cook a few minutes, or until the paste just starts to darken.  Add the white wine to achieve the desired consistency and bring to a boil before adding the capers and olives; heat through and taste for seasonings before serving.  Enjoy.

Thursday, August 11, 2011

Bell pepper bounty...

$1.50 a package!  Really!!

I know you've all heard it before, but here it goes again...bell peppers are one of my favorite veggies, especially the red ones (and avocados, and summer tomatoes, and summer corn :).  Well, lucky me, I keep finding these packages of  six huge bell peppers at Kroger for only $1.50!!  Just like 'day old' bread, it bothers me not in the least to buy "day old" peppers, especially when the red, orange and yellow ones are usually $1.50 EACH. 

I like to cut the side into strips and dice the tops and bottoms.  Now I'm ready to cook from the prepped peppers for a week.  And if I'm not going to use them all within the week they are ready for the freezer to be used this winter when I am unlikely to find these bargains.

I had really been in the mood for a repeat of the chilies rellanos I had created using midget sweet peppers (kinda like midget bells), so I thought I'd make it again, this time using the bottom thirds of some of these beauties.  This could easily be a more traditional looking "stuffed pepper" by using four whole bells and baking a bit longer.

 Ready and waiting.

Oh, look at these just out of the oven :)

Just looking at this photo makes me want these all over again.
You can find the recipe here if you too are jonesing for some
chorizo goodness.

Sunday, June 26, 2011

1st of the season (sort of)...


I couldn't wait for my own plants, so I bought 2 pounds of jalapeños from the grocery (gasp!  not even the farmer's market? you ask).  We do what we have to do...I've been wanting more of these unprocessed pickled chilies since we ran out of them last December.  These are the best we have ever had, crisp and ever so slightly sweet.  Click here to see how to make these for when you have your own bumper crop (or great find at the market, or even the grocery store).

Friday, September 3, 2010

So many chilies...


Our jalapeño plants continue to to give us heaps of chilies, so I just had to try this simple pickling method I found in The New York Times.  I had a pound of jalapeños so I simply increased the amounts given in the recipe...yes, we really do eat that many chilies.  I did add some sugar to the recipe to balance the vinegar, and the result was fantastic.  These ended up being crisp like a fresh chili, while having a nice pickled flavor...the best of both worlds.  As I'll be picking another batch next weekend, I think some more of these will be in order.


Tangy Salted Chilies
adapted from The New York Times

3 oz. fresh chilies of choice
1/4 cup white vinegar
1 1/2 tsp. kosher salt
1/2 tsp.white sugar

Slice chili peppers very thinly. Place them in a jar and stir in vinegar, salt, and sugar. Cover loosely with a lid, or with cheesecloth and a rubber band.  Refrigerate for five days, then close lid tightly. Keep stored in refrigerator; peppers will last for several weeks or months.Adjust the recipe accordingly for a larger quantity of chilies.

Makes about 3/4 cup


Monday, August 2, 2010

Making escabeche...

Jalapeños en Escabeche

Making escabeche...I'm not refering to the pickled fish dish here, but Jalapeños en escabeche, or pickled jalapeños, escabeche in Spanish referring to a brine or pickling marinade.  I have long been a fan of pickled jalapeños, but never had eaten them pickled with other vegetables until a trip to Mexico in 2007.  I especially liked the crisp, spicy carrots (zanahorias) and started buying them at home (look in the Latin section of your grocery).  Our jalapeño plants are going crazy this summer so I thought I'd make my own.  This will need to sit at least a week to be their best, but the leftover bits that didn't quite fit into the jars were very tasty indeed.

Jalapeños en Escabeche
adapted from Simply Recipes
 
1 lb jalapeño slices
 3 carrots, peeled and sliced
1 large onion, quartered and sliced
1/2 of a small head of cauliflower
1 head of garlic, cloves, peeled, halved if very large
1/3 cup olive oil
4 cups cider vinegar
2 tbs. coarse salt
1 tbs. sugar
2 bay leaves
1/2 tsp. dried oregano
1/2 tsp. dried thyme
1/2 tsp. dried marjoram

Slice the jalapeños, carrots, and onion roughly the same thickness, and break the cauliflower into little florets.  In a fairly large nonreactive pot, saute the veggies and garlic in the olive oil over medium heat for 10 minutes.  Add the remaining ingredients, bring to a boil, reduce the heat to medium and cook for 10 minutes (they are smelling fantastic at this point). 

Ladle the hot veggies and brine into 4 sterilized pint canning jars, leaving 1/2' head space.  Stick the handle of a wooden spoon down into the jars to remove any air bubbles before lidding and processing in a hot water bath for 10 minutes.  Cool and store in a cool place for at least a week before eating (I hope we can wait that long :).

Note about processing...I gave away all my canning supplies a few years ago when it seemed like I just wasn't going to do it anymore (who knew), so I did not have the large pot with the lift out rack for hot water processing.  Since I was just using piny jars, and a small quantity at that, I was able to process these in my tall soup pot.  The pot was just large enough for the 4 jars to fit inside without touching, and tall enough for the water to cover them by one inch- I just rested the jars on a dish cloth inside the pan to keep them from knocking around.  To ensure I had adequate water in the pot, I filled it with the jars sitting in it, and held them down to keep them submerged.  To speed the process, I brought the water up to a boil while I was cooking the peppers so I was ready to go as soon as the peppers were.  It wasn't perfect, but perfectly adequate for canning a small amount without having to purchase (and store) the equipment.

Saturday, July 31, 2010

Bones and shells...

Here is the process I used in dealing with the ham bone I used in the jambalaya.  This same method will work for other dishes, but if you are making bean soup, you may just wish to cook the bone with the beans (just remove the bone at the end and add back the meat).

Whenever we have ham, I intentionally leave quite a bit of meat on the bone- not only is serving easier this way, but it leaves the bone meaty for other uses.  I simmered the bone covered all morning while I was busy with other things and just checked it every now and then, turning the bone around in the stock each time.  The water covered about 3/4 of the bone when I started and used no added seasonings, ham having plenty already.

I removed the bones and meat to a plate to cool...as you can see, the meat fell off in pieces.

Once it was cool enough to handle, I shredded up the meat, leaving it in fairly large pieces, and discarded the fat, bones, and silver skin.  I ended up with roughly 2 cups of meat.

I strained the broth into a large bowl- this removes any small bones, as well as pieces of fat that have broken off unto the stock.

A few hours in the fridge solidified the fat.  This I skimmed off to brown the ham for the jambalaya.  This fat can be reserved to cook with, just make sure to refrigerate it, or discarded.  The stock below is gelatinous, like loose jello, a good sign that it simmered a long time.  If not using the stock now, just ladle into freezer containers for later use, I find 2 cup portions to be most helpful.

I used 4 cups for the jambalaya and still had 2 cups leftover for the freezer.

I have been saving the shells from shrimp in the freezer with the intention of making stock.  After peeling the shrimp for the jambalaya I had the shells from 4 pounds of shrimp and decided to go ahead and make it.  I put the shells in a medium pan with about 5 cups of water, a teaspoon of salt, small handful of whole black peppercorns, and a Bay leaf.

 I left this to simmer while I made dinner (about and hour).  I turned off the heat and just left it until I was leaning up after dinner.

Strain the broth into a bowl, pressing on the shells with the back of a spoon to get out all of the liquid.  I tasted the stock, and with the addition of a bit more salt, would have been perfectly good to sip on its own.  I can't wait to see what idea hits me to use this wonderful stuff.

I ended up with 4 generous cups of stock to tuck away in the freezer.  This took practically no effort.  And to think, I could have just thrown the shells away, which is what I have done for years :-(

Saturday, June 19, 2010

I'm back from camp and cooking again...

BBQ Chicken, Southwestern Rice,
and Cucumber Salad

We are all home and relaxing, me and my three guys from an exhausting week at scout camp, and Nicole, from her adventures inPrague.  Except for a crockpot meal on Monday night, not much cooking has been happening,and Nicole was lamenting the lack of leftovers in what is normally a full fridge.   Split breasts on sale at Kroger for one dollar a pound meant BBQ chicken for dinner, and the contents of a veggie drawer that needed to be used lead me to an accompanying rice dish and cucumber salad.  Dinner on the deck with fresh limeade all around (with a bit of tequila for the grownups :) made for a great night at home on the deck.
Ben is a proud grill master and snapped this photo of "his" chicken after he pulled it off the grill.  The unsauced breast to the right is intended for this evening's dinner- this huge breast is nearly a pound on its own, and when we go back to Kroger today for Father's Day steaks, I'll be picking up more of these for the freezer.

Tuesday, June 1, 2010

No more bananas, please...

Christopher making a batch of banana bread.

For the scout training event we had weekend before last, I had purchased enough fruit for 40 adults.  This was great, except that they forgot to set it out for breakfast and BUNCHES of bananas ended up coming back home with me. I ate bananas every day until I felt like I had them coming out of my ears.  Come Saturday and there were still 16 (!) on the counter, and their state of ripeness dictated that they had to be used NOW.  Christopher wanted banana bread so I found a recipe that would use six (the most I could find) and set the boy to work making the bread himself.  Chris did a fine job, doing everything himself and loved the results all the more for having made the bread himself.  The bananas we had left I froze and will use in future smoothies (also one of the boy's favorite things to make).

Banana Bread
adapted from the Pfaltzgraff Collector's Cookbook
 1 cup canola oil
1 1/2 cups sugar
4 eggs, beaten
6 ripe bananas, mashed
2 cups all-purpose flour
2 tsp. baking powder
1 tsp. salt
1 cup chopped pecans or walnuts (optional, we did not use)

Preheat oven to 350 degrees.  Thoroughly mix the wet ingredients, to include the baking powder and salt.  Add the flour and mix to just combine.  Pour into 2 greased loaf pans ans bake for 50 to 55 minutes, or until the loaves test done.

Kitchen Tip...

Did you find bananas on sale dirt cheap, or just have a few too many around that you don't want to spoil?  Peel the bananas and freeze individually on a lined baking sheet.  Once frozen solid, just pop them into a freezer bag for future use.  Thaw and mash as many as you need for your favorite recipe, or use frozen in smoothies.

Thursday, May 13, 2010

Another new toy...

Grilled BBQ Chicken, Grilled Veggies,
and Freezer Cheese Mac and Cheese

For the longest time I have been meaning to get a grill basket; we have two grills, shouldn't we have all the accessories too?  I saw one at Aldi an few weeks ago, and at $5.99, I finally had my basket.  The inuagural use was grilled veggies (a mix of zucchini, red onion, yellow bell pepper, and crimini mushrooms) and I don't think I will ever skewer another veggie again.  I have used this basket again several times since and will soon be trying shrimp and scallops in there as well (can't wait).
 Look how nicely this fits on the grill, and cleanup was a snap.

Kitchen Tip...

We like to eat all sorts of different varieties of cheese.  When I get those small bits leftover that aren't worth wrapping up for another meal, or will soon spoil if not used, I drop them into a a quart sized freezer bag and stash them in the freezer.  I keep this bag going, putting in all manner of cheese, and when I get 12 to 16 ounces saved up, it is time to make mac and cheese (this is especially tasty if some bleu cheese has made its way in).  The quality of the cheese does suffer a bit, for the purposes of making mac and cheese, it is just fine. 
The penne and my bag of cheese from the freezer.  If you have any softer cheese in the bag (that is a piece of gorgonzola dolce near the bottom left) you may wish to grate up the cheese while it is partially frozen.  Just substitute the cheese for that called for in your favorite recipe.
I don't normally top my mac and cheese with bread crumbs, but I decided to be different this time and the family loved it.  For this I just mixed some of my dried homemade bread crumbs with some melted butter, so there were two tasty money saving tips in this dish.

Thursday, April 22, 2010

A lot of pesto...

Rotini with Arugula Pesto, 
Lemon Baked Salmon, and Stuffed Clams

This has been a busy, busy week, and while I have still been cooking, I haven't been writing about it (sorry).  One of the dishes we had this week was an adaptation (but, of course) of a recipe I found at Mama Jan's Kitchen, another of my regular food blog reads.  This recipe, originally from Giada DeLaurentis, called for spinach and Asiago cheese, neither of which I had on hand.  I did however have an unopened package of baby arugula and a wedge of Parmesan cheese, so I went with it.  I also added more garlic than called for (love it),some lemon juice to brighten it (and help keep that beautiful color), and I tossed the rotini with a bit of cream before mixing in the pesto to enrich the dish.  Served with some shaved Parmesan, this was a truly satisfying dish, and went especially well with the Lemon Baked Salmon and stuffed clams that we had with it.

This recipe made a LOT of pesto.  After tossing some of the pesto with the 12oz. of whole wheat pasta I had cooked, I still had a lot left in the food processor.  Out can a brick of cream cheese to mix with a couple tablespoons of the pesto (yum), and I still had about a half cup left.  This last bit I spooned into a small container and stashed it away in the freezer after giving it a thin coating of extra virgin olive oil.  I love when a simple recipe can serve so many purposes.

Saturday, February 6, 2010

Grillling in the snow?

 Bruschetta Burger (many apologies for the out of focus photo)

While I had planned on last night's bruschetta burgers for dinner, I had not planned to grill in the midst of a snowstorm...the answer lay in my George Foreman grill.  While I do not use it a lot, this little appliance has been most helpful for grilling needs during inclement weather, and those times when you are grilling so little that it is not worth the bother (not to mention the expense) of using an actual grill.  I had four nice chuck patties (80/20), that I squished into oval shapes to better fit the mini ciabatta rolls that I had.  A note about the ciabatta rolls- I got these partially baked rolls at Aldi, and I find them perfect for all kinds of sandwiches, and they are cheap at $1.69 for a package of four (and the package will keep for a long time stashed in the fridge).  Anyway, back to the burgs- four minutes in the Foreman gave me a perfectly cooked "medium" burger, and another minute gave me a well done burger for the boy.  I layered these burgers onto the rolls with the leftover caprese salad from Thursday's dinner and some pesto mayo.  Delish, delish, delish, definitely and upscale take on the simple burger (but yet, still so simple to prepare).  The pesto I mixed with the mayo was from the stock I put away this summer in the freezer (I'll share below), but you can very easily use any prepared pesto from the grocery.
I was digging through the fridge looking for side dish inspiration (I did not want fries with the Italian flavors of my planned burger), when I spied a the bowl of leftover plain spaghetti from this week's spaghetti and meatballs.  In the veggie drawer I found bits and pieces of red bell pepper, red onion, steamed green beans (also left from a dinner earlier this week), and black olives.  I sliced everything up, tossed it with bottled Italian dressing (we like Kraft Tuscan House Italian), and dubbed it "clean out the fridge" pasta salad.  Pasta salads, like noodle bowls, are wonderful in that you can put just about anything you like in them.  This salad is going to pull triple (or quadruple) leftover duty- for today's lunch I am going to toss what is left with some shreds of leftover paprika roasted chicken.  I've said it before and shall again- leftovers are great.

Bruschetta Burgers

4 ground chuck patties (or whatever you like)
coarse salt, fresh ground black pepper, & garlic powder
4 small ciabatta rolls, toasted or warmed somehow
2 tbs. (about) light mayo
1 tbs. (about) prepared pesto
fresh mozzarella, thinly sliced
ripe, red tomatoes, thinly sliced
baby spinach, a good handful

Season the burger patties with salt, pepper, and garlic powder- grill as desired.  Toast the ciabatta rolls and split horizontally.  Mix the mayo and pesto- spread on the top half of the rolls.  On the bottom half build your stacks- spinach, tomato, burger, mozzarella, and top bun with pesto mayo. Eat (yum, yum).


"Clean Out the Fridge" Pasta Salad

leftover pasta
leftover bits of veg
leftover bits of meat and/or cheese (optional)
bottled Italian dressing

There is obviously no recipe here- just cut your leftover bits to match your pasta- if using long pasta like spaghetti, but your bits into strips, if something like a shell then dice it up (especially nice if the shells can capture the bits inside.  The key is to use a tasty salad dressing- none of that generic (and tasteless) Italian stuff.


Pesto

2 packed cups of fresh basil (tiny stems okay)
1/2 cup walnut pieces (or pine nuts, but they can be pricey)
1/2 cup grated parmesan
3 large garlic cloves, peeled  (about 1 tbs. if using jarred, pre-minced)
extra virgin olive oil

Rinse and dry the basil leaves (they don't have to be perfectly dry).  Toss into a food processor with the nuts, garlic, and cheese.  Pulse until chopped fine but not pureed.  Dump into a small mixing bowl (and repeat if making multiple batches).  Mix in olive oil to desired consistency.  Use immediately or package for freezing- if stowing in the fridge, cover with a piece of plastic wrap in contact with all the top surface (keeps it from turning a yucky color).
On the olive oil- I only mix in enough to make a paste and then package it into 1/2 cup portions for freezing.  If I find that leaving it as a paste gives me more options for its use- I use it thick for mixing into mayo or cream cheese (try that sometime for a taste treat on your morning bagel), or for rubbing under the skin of a whole chicken before roasting (try that one too).  If I want to use it as a sauce by itself I can thin it with more olive oil, or alternately, a little white wine or even warm water.  I make large quantities of pesto in the fall when my huge pot is short for the world- a great way to use it up and have some on hand to get me through the winter.
Related Posts Plugin for WordPress, Blogger...